Preparing for tomorrow doesn’t have to break the bank today. There are many ways to still prepare for emergencies without putting a financial strain on yourself or your family. What you have to do is get REAL about your NEEDS and prioritize your preps around those.

When it comes to preparedness there are many areas that require attention but if you boil it all down you will see all you really NEED are the basics; Air, Shelter, Water, and Food. It’s nice to have the latest and greatest gear, but when things are tight you need to be honest with yourself and focus on survival.
There’s a saying that floats around in the preparedness community; we are only nine meals from anarchy. The premise is that the average person has only three days worth of food (9 Meals). The fact is that the average person in the U.S. probably has less than 3 days of food and water in their home and even less have evacuation plans and shelter in place plans (AKA bugging in and bugging out)
Getting Started When On A Budget
If you are new to preparedness then the first order of business is to put together a bug out bag and bug out plan. Each member of your family will have their own bag and each will have items specific to their needs.

In most bug out (evacuation) scenarios, you will be able to drive your vehicle to your bug out location. Maybe it’s a hurricane that’s on its way, forest fires nearby or a wind storm made a tree fall on your house, there are numerous reasons why you may have to leave your home but many times you will see it coming and have some time to offset to a different location. By packing your bug out bag for the most likely scenarios you can save money on all that gear.
Make A Bug Out Plan – It’s FREE
So what do you really need to evacuate your home? First, you need a bug out plan. A bug out plan is essential and it costs no money. Do you remember in school having to practice fire, tornado, or earthquake drills? Having a plan in place and going over that plan periodically will create order out of chaos if you ever have to implement that plan, even better, practice the plan just like those drills in school. Each person in your family will know what to do and what their responsibilities are.
This plan may be as simple as “everyone, grab your bags and get into dad’s truck” or “everyone grab your bags and rally in the garage by your mom’s SUV, I’ll be loading the extra supplies into the vehicle, your mom will grab the dog, we leave for your uncle Dennis’s house in 5 minutes.
For more detailed information on making a bug out plan check out this article I wrote; How To Make Your First Bug Out Plan
A Budget Bug Out Bag
As I said before, the most common bug out scenarios will involve you evacuating your home and most likely by vehicle. You are likely going to a friend or family members home until the reason for your evacuation has been resolved.
I wrote an article all about putting together a bug out bag check it out here; How To Build A Bug Out Bag/Kit – A Practical Guide. Although that article isn’t for those on a tight budget It does cover the basic needs in depth.
You are on a budget, so you need to focus on the basics. You first need Air, protection from the elements (shelter), Water, and Food. Then when you have those covered you can start adding extras like medical and hygiene supplies and then other creature comforts later on.
The Bag
When it comes to bug out bags the sky’s the limit unless you are on a budget. I recommend a standard type backpack but in a pinch, you can use duffle bags or even better, travel luggage with wheels. Just remember that the bag needs to be large enough to carry all your essential items.
My preferred budget pack is the Teton Sports Scout 3400 (click here to check it out on Amazon) or click here to check out all of my recommended bags and packs. The Scout 3400 is a low cost, high-value pack that comes with the features you need. Although this bag is a little big for a basic bug out bag it will allow for room to grow into a full bug out bag/kit down the road.
- 55L/3400 Cubic Inch Capacity
- Internal Frame
- Fully Adjustable for Torso Length and Waist Size
- Fully Padded Shoulder Straps and Waist Belt
- Integrated Rainfly
For the preparedness minded individual, having a backup plan is a must and having car trouble is always a possibility. So remember that you may have to hike some distance with your bag which is why I would shy away from a duffle bag unless it has good shoulder straps as well.
Air
One of the most important things our bodies need is air. Without air, you will only live for about 3 minutes and after about 5 minutes without air, your brain will suffer severe damage. This makes breathing clean air vitally important.
Not all of us can fork out $300-$500 or more for a quality gas mask with extra filters and have the top level of protection for our entire family but we can get some protection from airborne particles. A 3M N95 mask doesn’t offer the same protection that an actual gas mask does but it’s better than nothing and is inexpensive and versatile, this will help prevent breathing harmful dust particles and other debris in the air.
Shelter/Clothing
For our “most likely” bug out scenario, we shouldn’t be needing shelter but it wouldn’t be a bad idea to throw a tent or some tarps in your bug out vehicle, just in case. What we really need to be covering in this section is personal clothing.
If you think about it like this; if you had to leave your home not knowing if it would be there when you return, what would you need to maintain some level of normalcy. Often times just a clean dry pair of socks can make your day better, even better yet a full change of clothes would allow you to have something to wear while your dirty clothes are being laundered.
This part shouldn’t cost much if anything at all. Most people can spare a couple of pairs of socks, underwear, pants, and shirts.
The types of clothes you put in your bug out bag will vary a lot based on where you live. No one knows what weather conditions you have to deal with better than you. Just remember to pack your bag with both summer and winter in mind. If you live somewhere that has cold winters you will have to have more layers and heavier outer layers than someone who lives in a more tropical region.
Water
The next essential item is water. All bug out bags should have some water. A couple of 1-liter bottles should be fine. Remember you should have some resupply in your vehicle.
Although you may not need it, I would include a small water filter and some Iodine tablets for emergency water purification. My favorite lightweight and inexpensive water filter is the Sawyer Mini Water Filter (click here to check it out on Amazon) All adults should have these in their bags, redundancy when it comes to water purification is almost mandatory.
Food
When putting together a budget bug out bag the two main items that will incur the most cost is the bag and food. Food can be a tricky one when you are on a tight budget. It seems that most foods that are suited for long-term storage and have easy prep tend to be on the more expensive side.
| 1 DAY (3600-3800 Cal.) | EST. COST PER DAY |
| Peanut Butter (20 Ounces) | $3-4 |
| Emergency Ration Bars (1 Pack) | $8-10 |
| Meal Replacement Bars (9 Bars) | $20-25 |
| MRE’s (3) | $25-30 |
| Freeze-Dried Meals | $40-50 |
Note: The daily calorie count I used here is on the high end. This calorie count is based on a large muscular adult male carrying a pack that is borderline too heavy from sun up to sun down maybe longer.
As you can see by the chart that I compiled, as the quality, taste, and shelf life increases so do the cost. The best approach is to mix and match items that fit into your budget. If your budget only allows you to eat peanut butter for 3 days straight you can sure do that but you may never want to eat peanut butter ever again after that.
Hygiene
Although hygiene isn’t critical to your immediate survival when you offset to a different location you may not have access to personal hygiene items. Each bug out bag should have individual hygiene items:
- Toothbrush
- Toothpaste
- Flause
- Soap
- Shampoo
- Hand Sanitizer
- Wash Cloth
- Medium Size Towel
- Deodorant
Many of these items can be found in small travel size containers, no need for full-size items here, these are for keeping you clean and sanitary over the short term and to lessen the burden of those who will be taking you in.
Personal Items
Don’t forget about any and all personal items that you may require i.e. personal hygiene items, medications, and individual medical devices and equipment. Remember that if you require special medications or equipment you may not be able to find what you need after getting to your bug out location.
Medical/First Aid
Lastly, each person should have their own trauma kit and at least one in your group should have a decent first aid kit. When it comes to trauma kits you should NOT buy cheap! This is a selection of items that may be needed to save your life or someone else’s and going cheap may jeopardize those efforts. Check out my recommended gear – trauma/first aid

That’s a basic budget bug out bag without all the frills and gimmicks that will cover 99% of most bug out/evacuation scenarios.
General Preparedness
For those who have a basic level of preparedness but want to expand and improve upon their existing preps and find it hard to come up with the extra cash to do so, you’ve come to the right place.
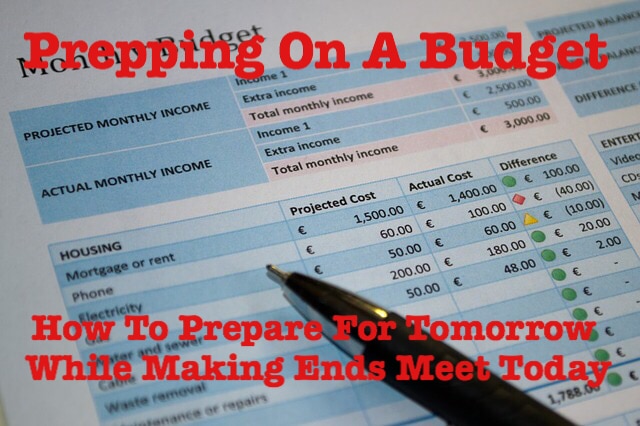
Your Budget
Everyone has a budget but you may not have as much expendable income as you would like. If you are serious about getting prepared you will have to have a “prepping budget” to aside money specifically to meet your preparedness goals.
The trick is to tighten your belt and comb over your expenses to find the things that you can cut out of your budget and redirect that money to your preparedness fund. It’s those little habits like buying that coffee every morning that add up over time and give you no real value.
When you are going through your budget, with each item you need to ask yourself, is it something I want or need and does it hold greater value than the preps I want or need?
Prioritize Your Preps
Sometimes, when it comes to preparedness we often get caught up in wanting all the cool gear and gadgets and lose sight of what’s most important, many times most of that gear isn’t really necessary. Focus on the basics; shelter, water, and food. For instance, if you have 3 months worth of firewood for your wood stove that’s great but if you only have only a 1 month supply of food and water you better focus on getting your food and water preps caught up to your heat/shelter.
This will require that you perform a self-assessment, the key is to be as honest with yourself as possible about what you have and what you need. Once you’ve done this you will know what you are lacking and you can focus on what’s most important.
Focus on Skill Sets
The beautiful thing about skill sets is that you take them with you where ever you go, you can’t lose them (if you practice them anyway), and no one can take them from you. The key is to learn as many survival, prepping, and homesteading skills that you can and practice them as often as need to maintain those skills.
There are many skills that you can learn for little or no money. The internet contains a wealth of information you just have to find it. Just remember if something sounds a little off you should check the information from different sources, remember the old adage ‘Trust but Verify’.
For free training you can also join your local CERT or volunteer fire department, these will offer different types of search and rescue training and basic first responder medical training, both will contain valuable skills that can be useful to anyone into preparedness. Being involved in these activities will allow you to be more engaged in your community and will allow you to learn more about the strengths and weaknesses of your local emergency response plans. You can also use these training events for networking with others that are of a similar mindset.
For low-cost medical training, the American Red Cross offers some basic CPR and first aid training both hands-on and online. If you have no medical training then this is a good starting point. For more information on Red Cross training check it out here >>> Red Cross Training
Free and Low Cost Preps
Many free and low-cost preps and supplies are best found by networking with friends and other like-minded people. When looking for something in particular, you can check with your network of friends and find items that they have upgraded and don’t want or need anyone and usually at a fraction of the cost of new.

There are many ways to find low-cost items for your emergency preparations. You have the good old fashion methods like yard sales but with the advent of the internet, finding things is easier than ever before.
- Yard Sales
- Second-Hand Shops
- Pawn Shops
- Flea Markets
- Auctions
- Craig’s List
- Local Facebook Wanted/For Sale Pages
Final Thoughts
Getting prepared will cost money, there’s no way around it but it doesn’t have to be as expensive as it could be. Of course, there are things that you may need that you just can’t find on the cheap and there are some things you don’t want to get on the cheap but there are many things that you can get used or can get the scratch and dent model and it will work just fine.